
Belt
Tensioning
Belt
Replacement
Motor
Replacement
Important: Power off printer
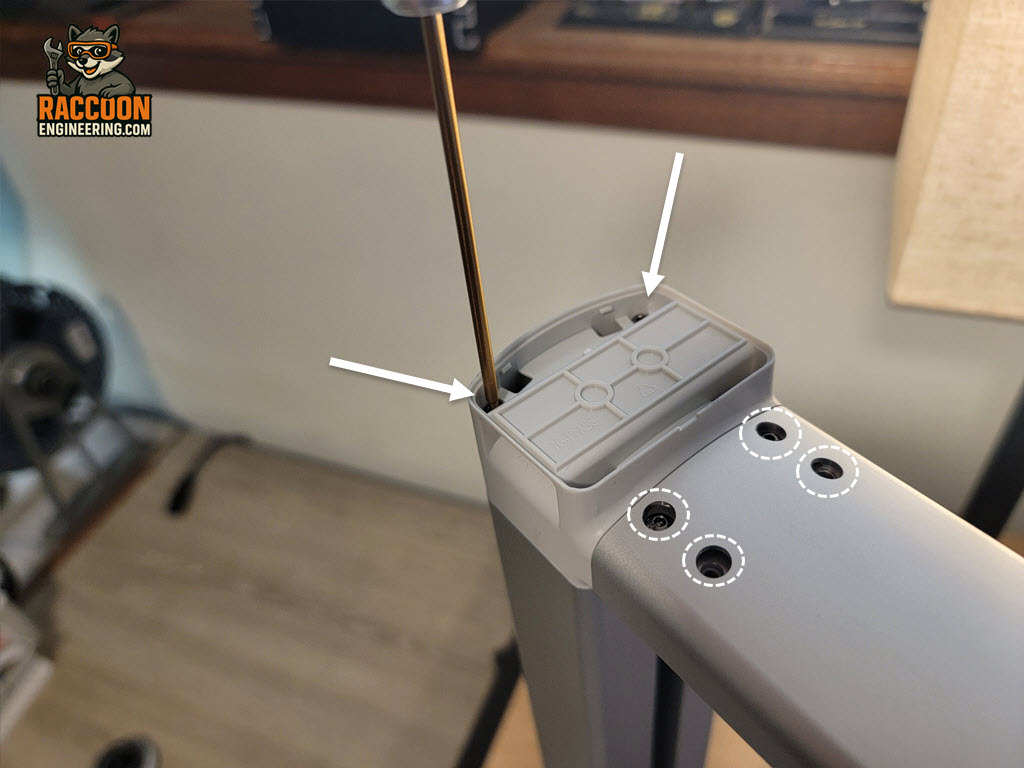
Tensioning the Z-axis belt
Remove the decorative caps from the top of the gantry. Using a 2 mm allen wrench remove the screws securing each plastic housing (Figure 1) and lift off the plastic end caps. You can then loosen the Z axis adjustment lock screws on one side (Figure 2 – white circles). This will take tension off the belt.
Unlike the other two axes on the printer, the Z-axis does not use a spring-loaded tensioner. Belt tension is adjusted manually by loosening the locking screws (Figure 3 – white circles) and pulling the adjustment blocks outward. This can normally be done by hand, and the use of pry bars, screwdrivers, or other tools is neither necessary nor recommended, as they can easily damage the plastic components. Simply pull the adjustment blocks outward firmly while tightening the locking screws to secure the desired tension.
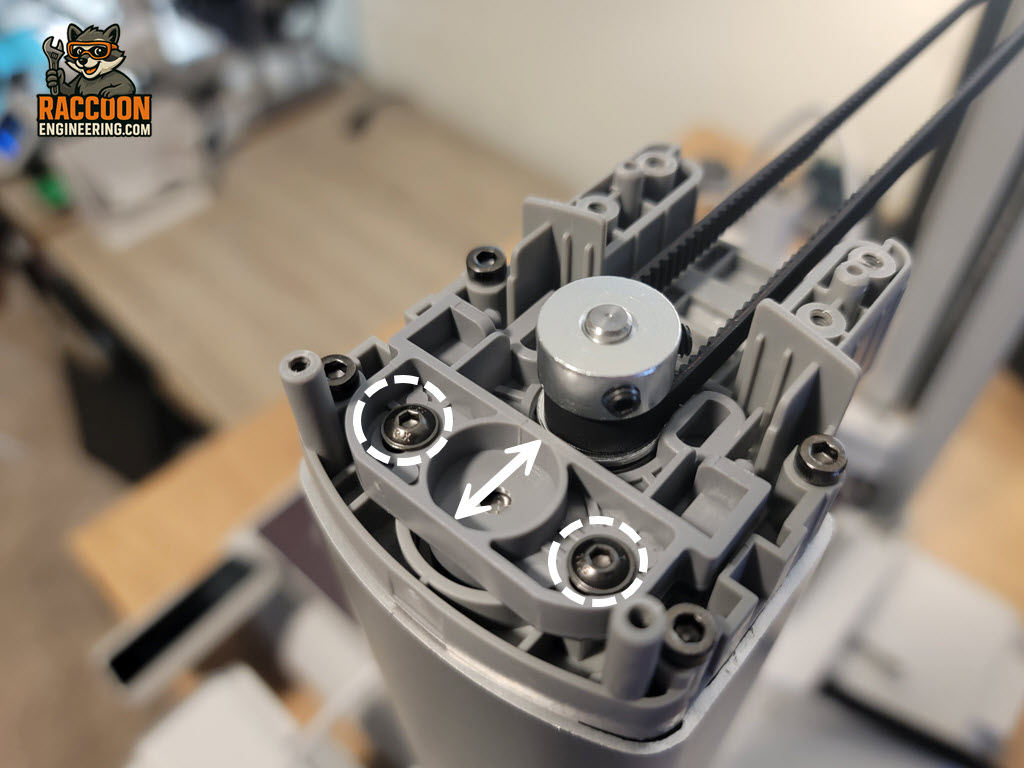
Once both sides have been tightened, rotate the Z-axis by hand several full revolutions to verify that the belt tracks smoothly and that there are no tight spots or binding. The belt should remain centered on the pulleys throughout its travel. If it tends to walk to one side, loosen the adjustment block slightly and make a small correction before retightening the screws.
When everything moves freely, reinstall the upper covers and decorative caps. Finally, run the printer’s calibration procedure and verify that the Z-axis belt passes the resonance test. If the printer reports the belt tension is outside the acceptable range, make small adjustments as needed and repeat the calibration. Taking a few extra minutes to fine-tune the belt tension will help ensure smooth operation and consistent print quality.
Note: The gantry X axis bar should have play up and down on both sides in the Z – axis direction (lash). If not, lead screw adjustment is needed. Without lash you can get some Z offset lines in your print.