
Belt
Tensioning
Belt
Replacement
Motor
Replacement
Important: Power off printer
Y Axis Belt Tensioning
You will be working with three screws. Note that the center spring compression screw is not used to tension the belt. It is used to compress the tension spring to remove the belt. However, it must be loose before tensioning the belt.
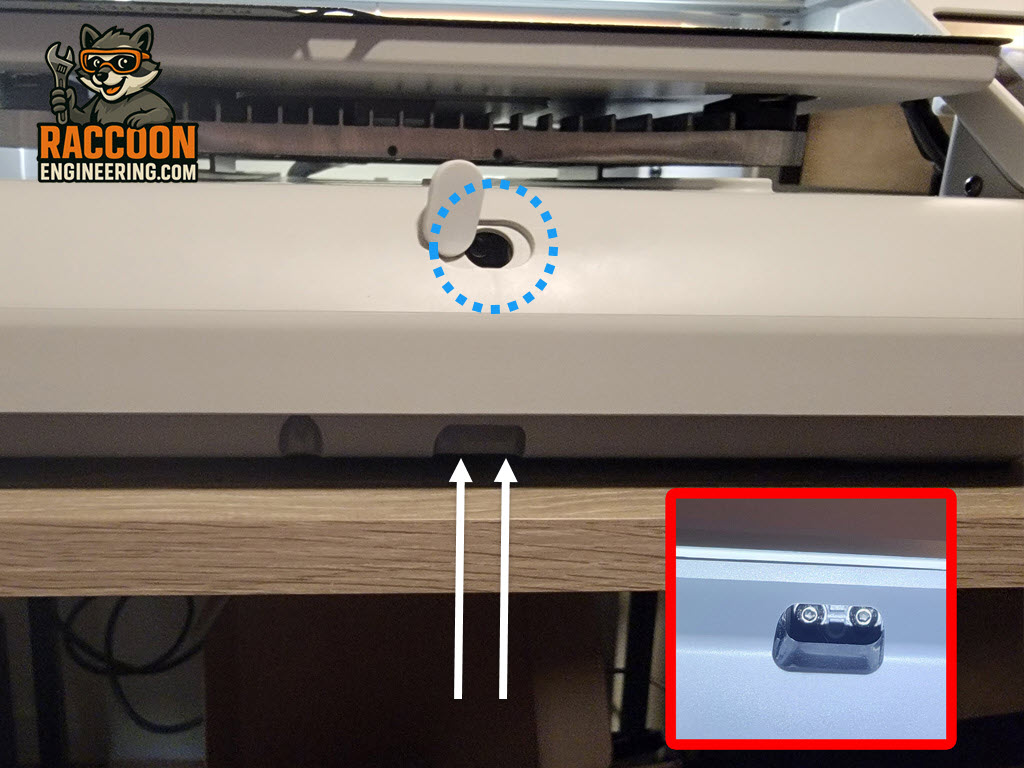
Using a 2.5 mm Allen wrench, back out the center spring compression screw located under the rubber plug not already loose (Figure 1).
Then with 2 mm Allen wrench, loosen the two tension locking screws on the bottom of the printer (white arrows). The spring will automatically push the idler into the correct position, setting the proper belt tension. Move the bed front to back slowly a few times and then lock the two tension locking screws.
Turn the center spring compression screw in until it just contacts the housing. Do not tighten it.
The X-axis belt is now properly tensioned. If this is a belt replacement, you will need to cycle the axis a few times and retension a second time as the belt needs to get settled in or it will likely fail resonance calibration check.
Full Calibration is required.