Adjusting the X-axis belt takes only 2–3 minutes. The tensioner contains a spring that automatically sets the correct belt tension.
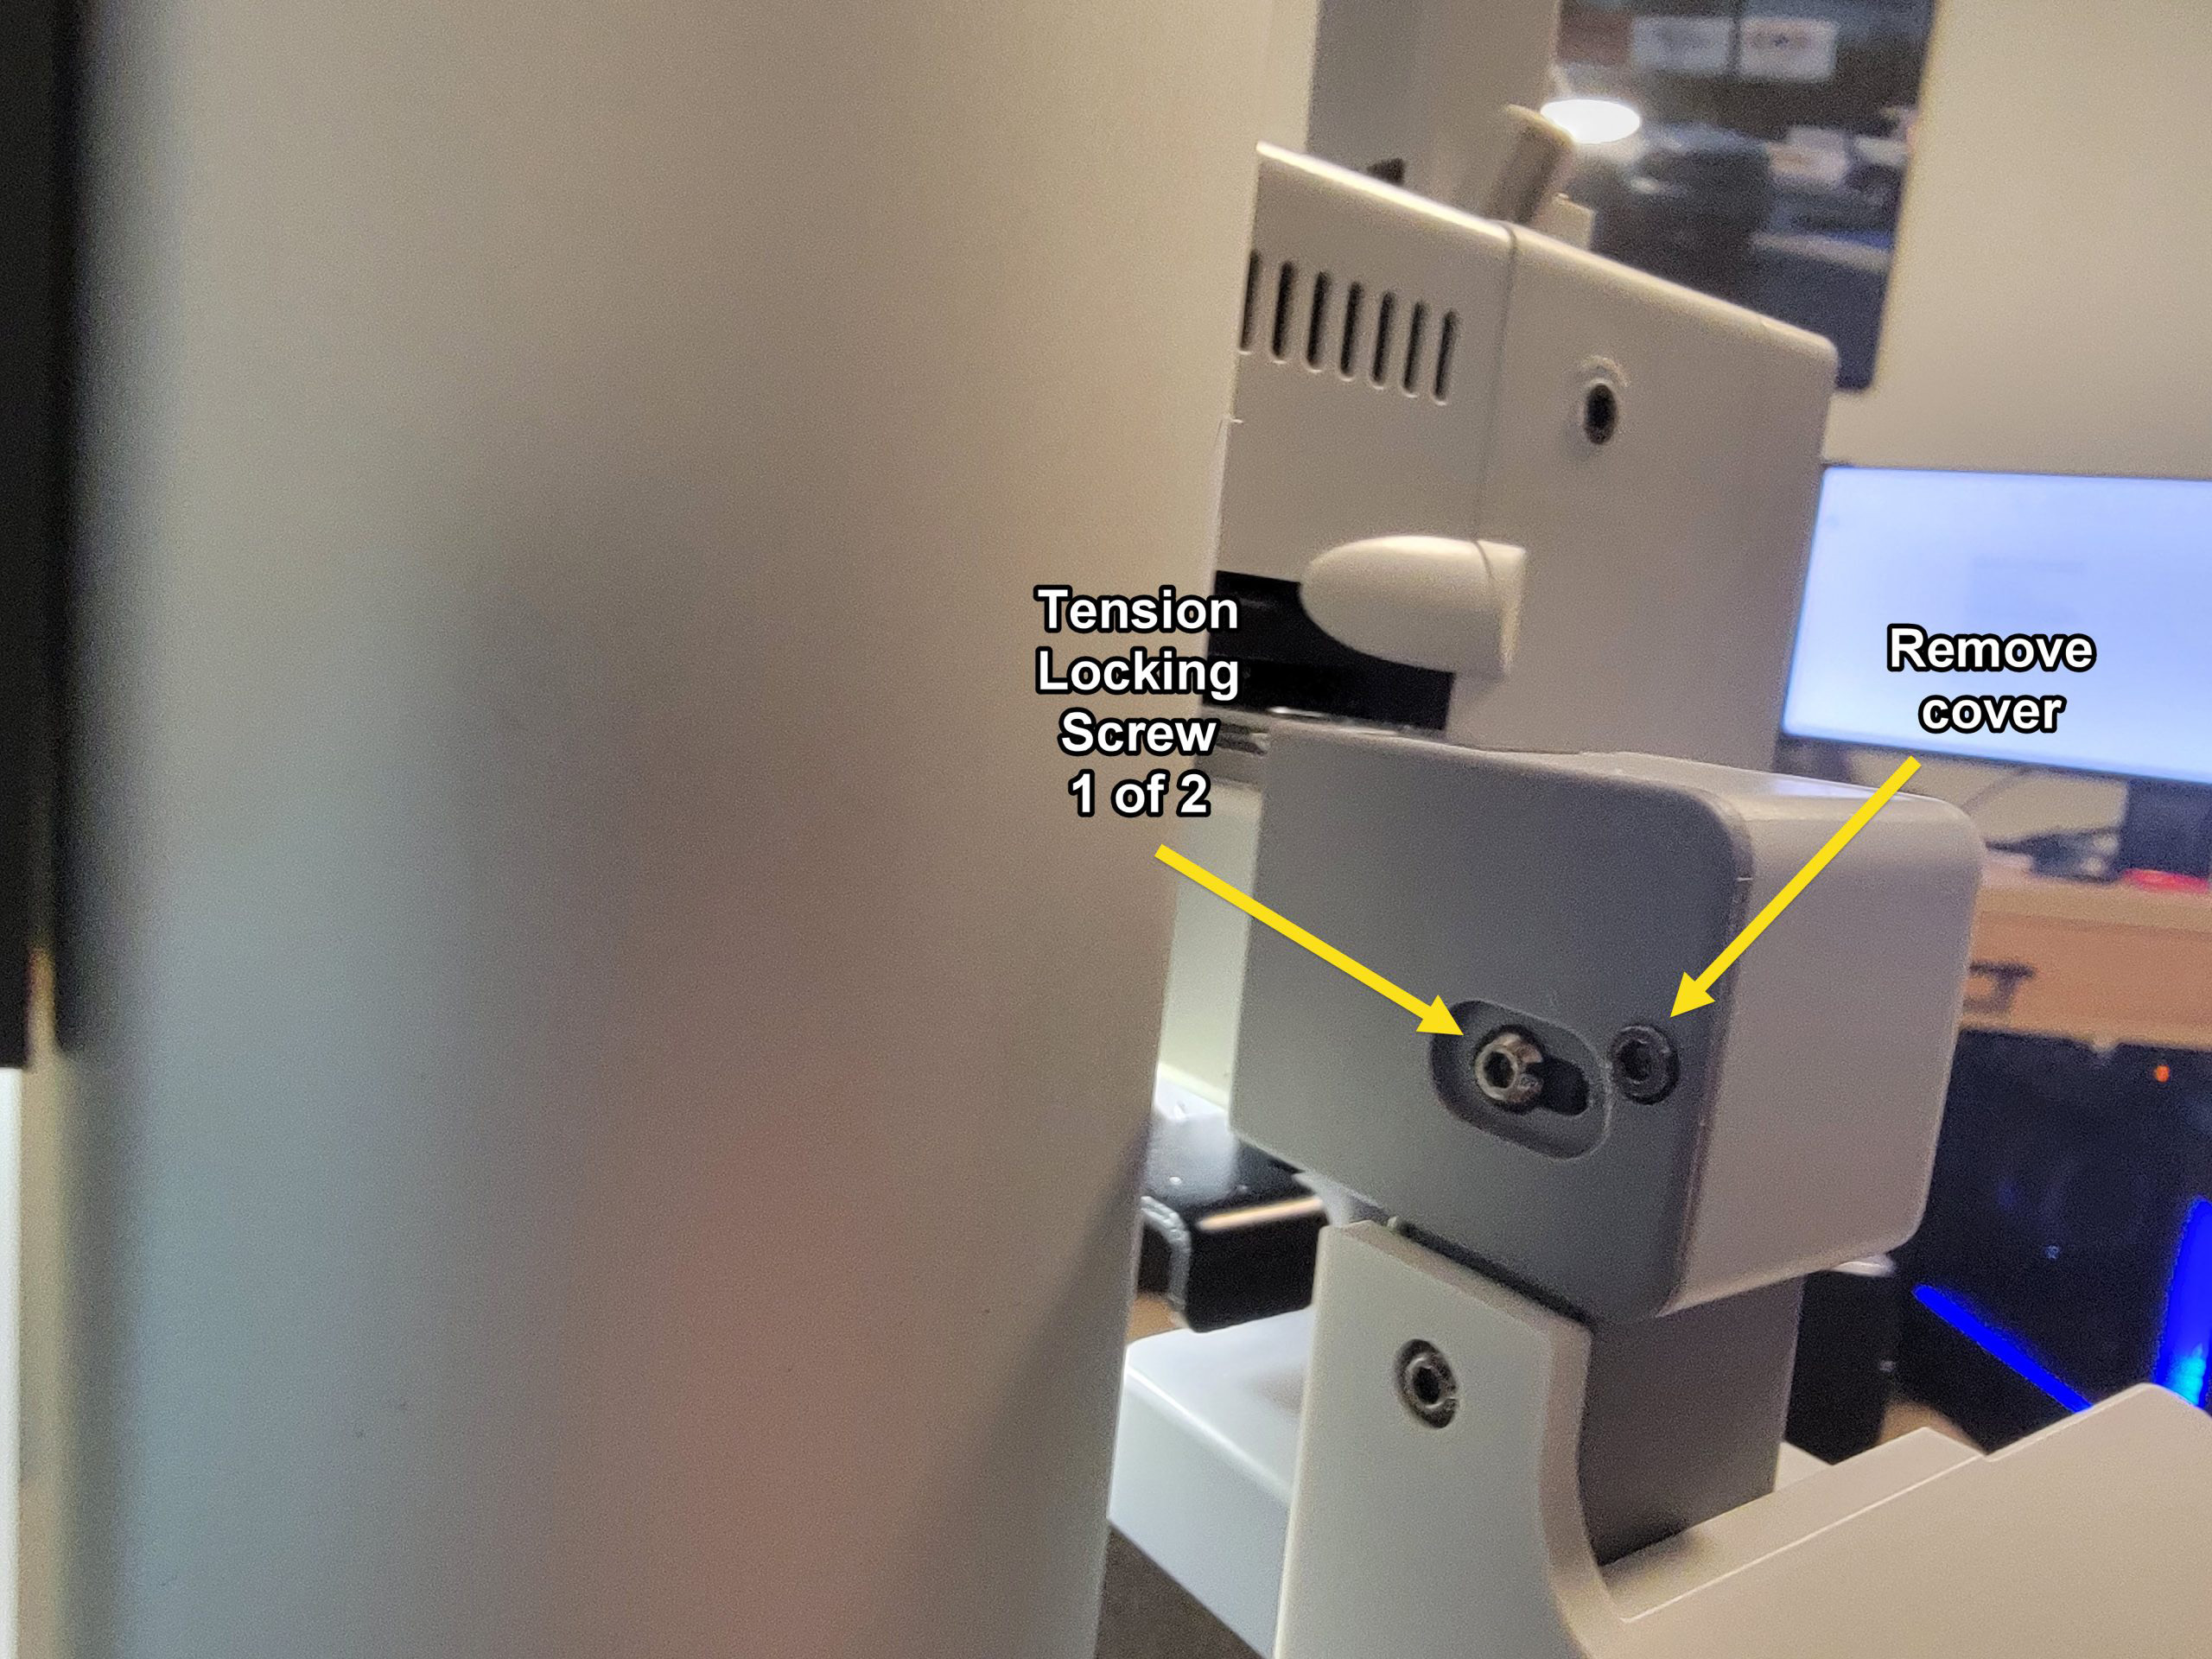
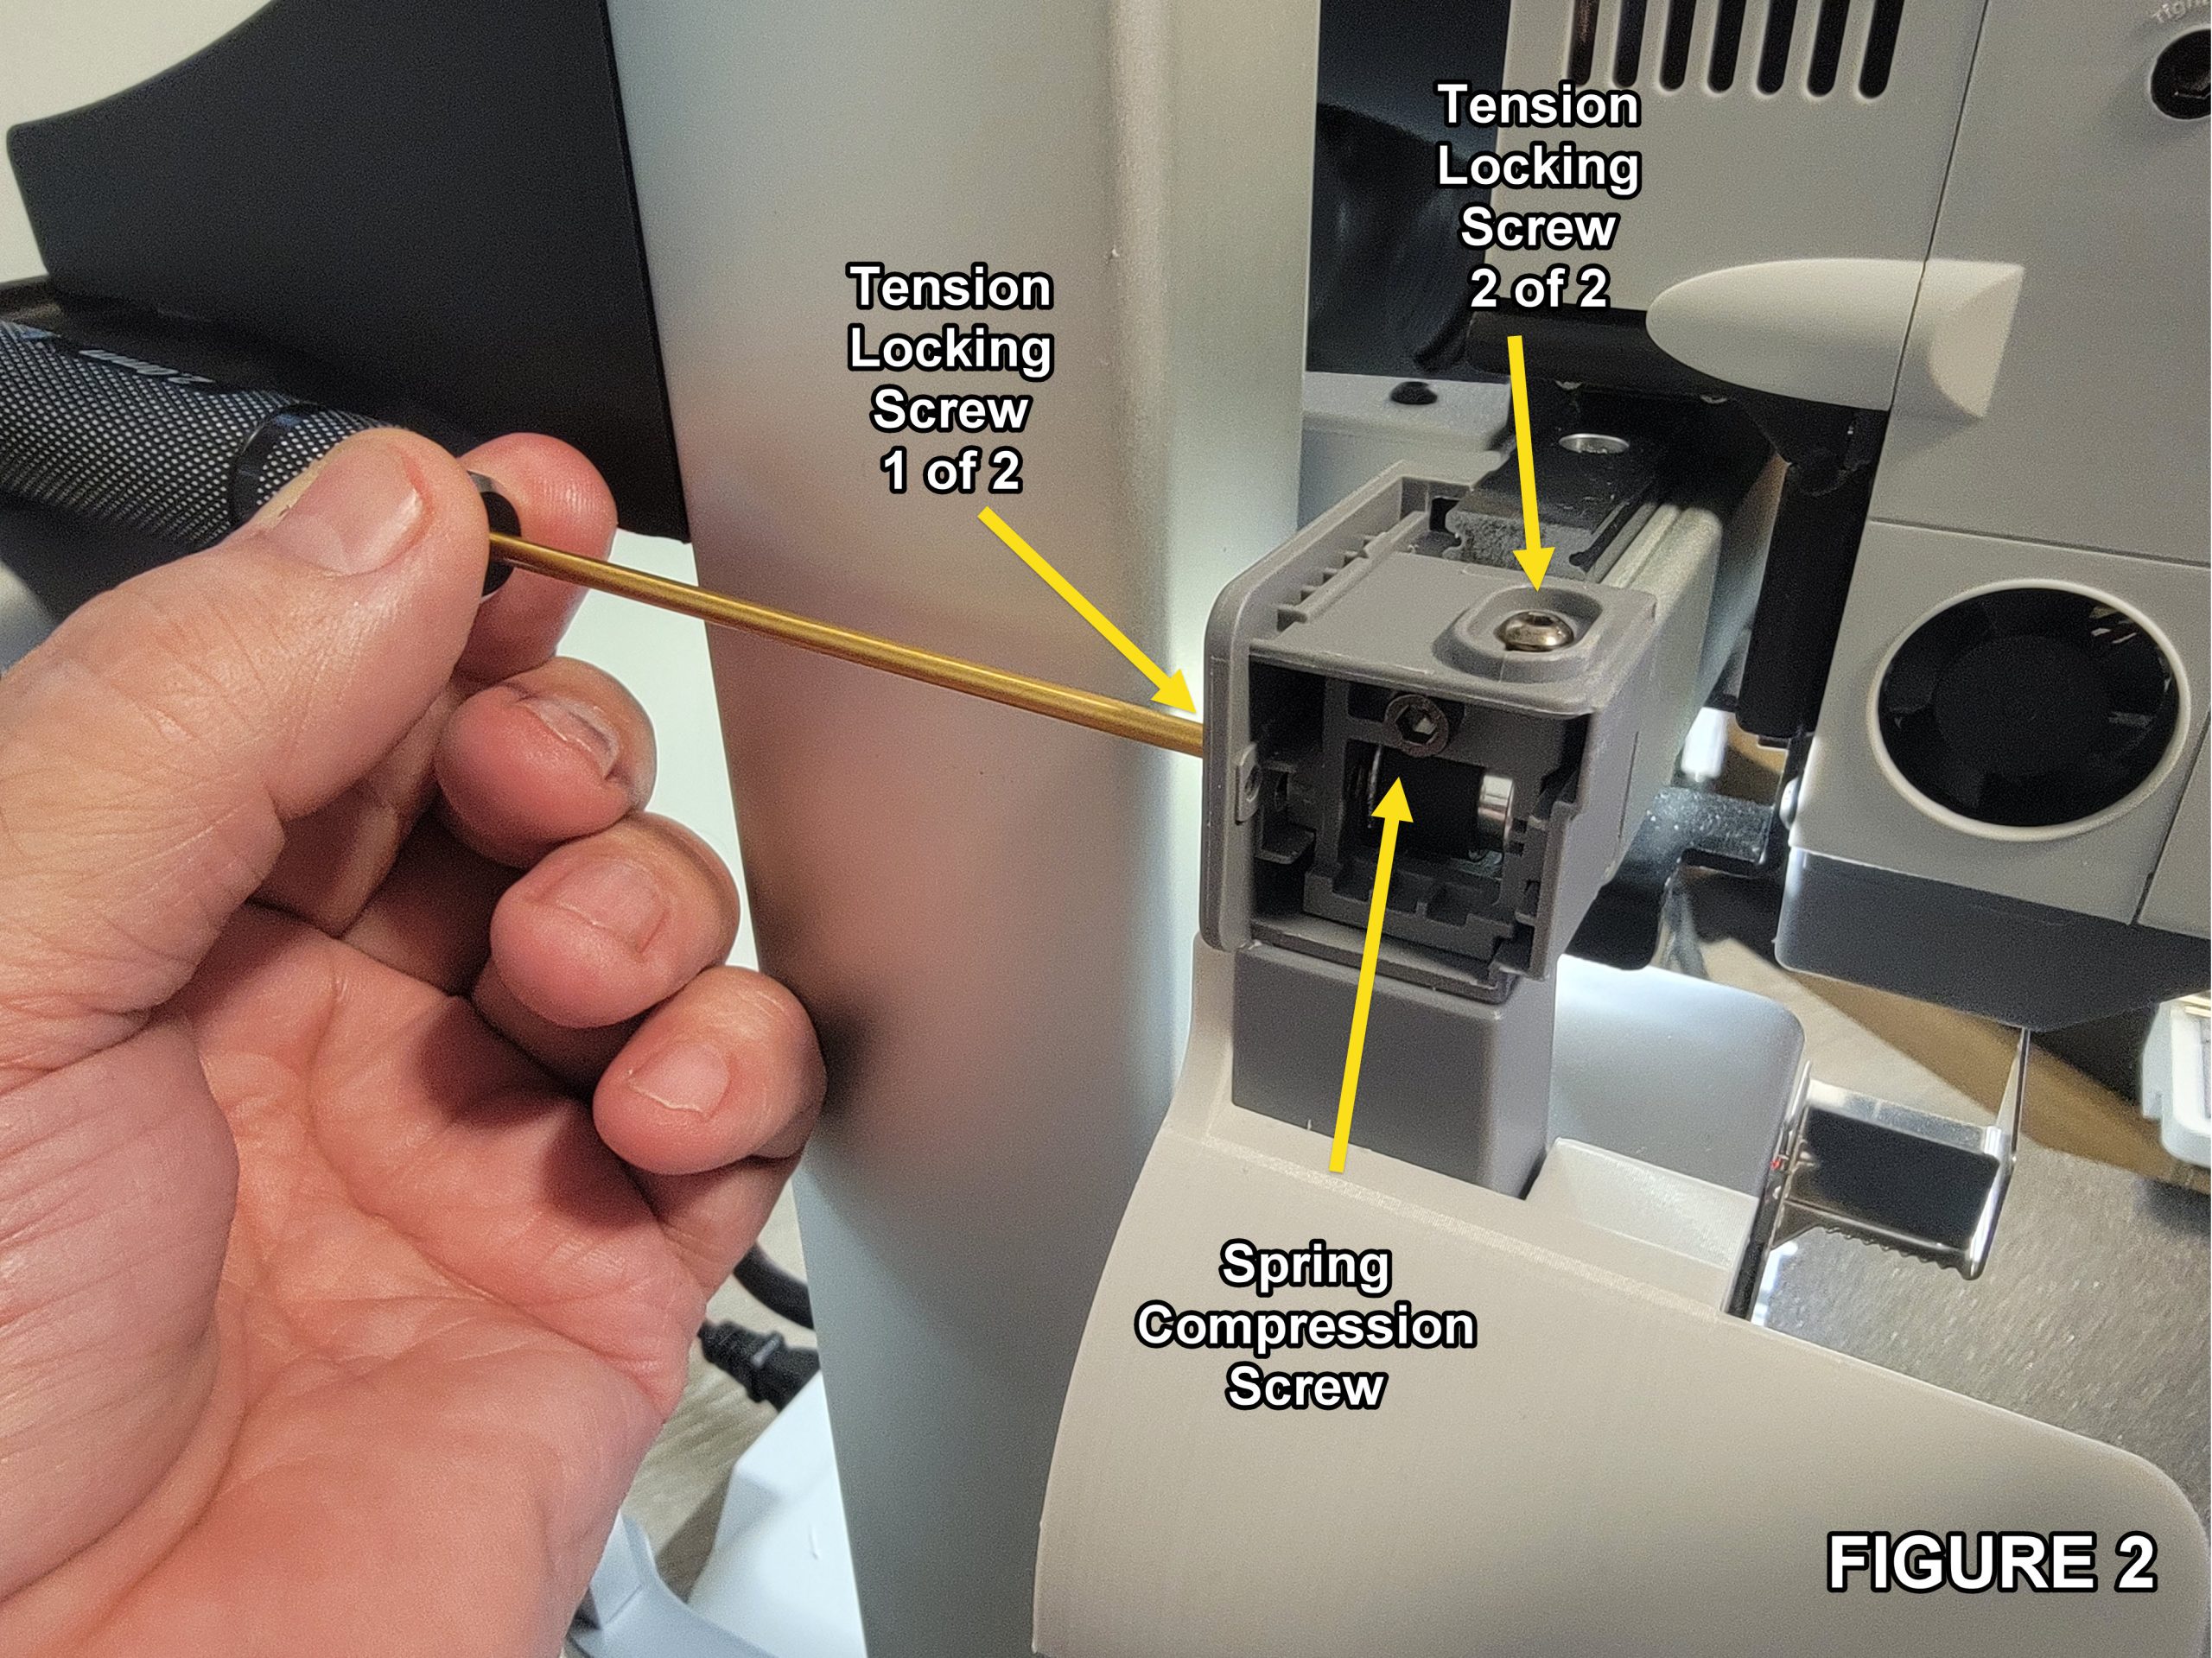
Remove the left-side cover. It is secured by a single 2 mm Allen screw on the rear of the cover (Figure 1). You will be working with three screws. Note that the center spring compression screw is not used to set belt tension. However, it must be loose before tensioning the belt.
Figure 2
Using a 2.5 mm Allen wrench, back out the center spring compression screw if it is not already loose.
Using a 2 mm Allen wrench, loosen the two tension locking screws (Figure 2). The spring will automatically push the idler into the correct position, setting the proper belt tension. Retighten the two tension locking screws. Turn the center spring compression screw in until it just contacts the housing. Do not tighten it. Reinstall the cover.