
Belt
Tensioning
Belt
Replacement
Motor
Replacement
Important: Power off printer
Y Axis Belt Replacement
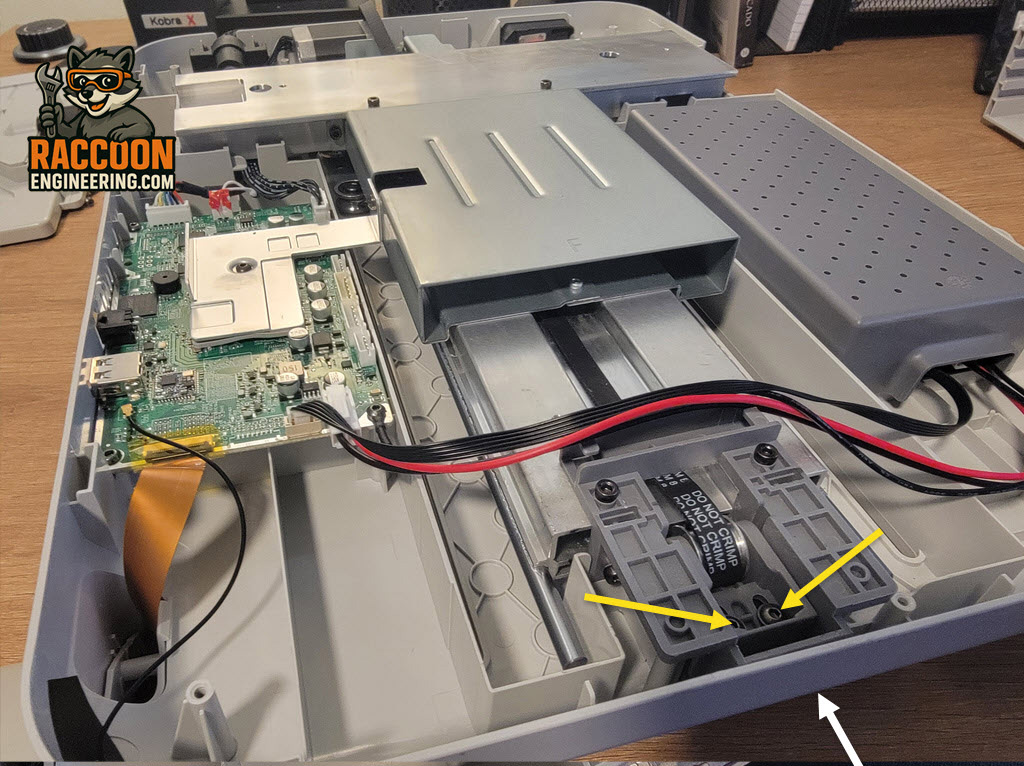
The belt is located under the bottom cover. It runs between the belt tension assembly on the front of the printer and the stepper motor located at the back. The ends of the belt attach to the bed carriage. Access to the belt ends requires you to remove the heat bed..
Remove the bottom cover following the procedure here.
Remove the heated bed assembly using a 2 mm allen driver (Figure 3). It is not necessary to disconnect the heated bed cable. Once the mounting screws have been removed, carefully move the heated bed assembly to the side of the printer so it is out of the way while still connected.
If you need to disconnect the heated bed cable, the connectors are located on the back of the power supply. Remove the screws securing the power supply cover to access the cable connections. Be sure to note the cable routing before disconnecting anything to ensure proper reassembly.
With the heated bed removed, take out the four bed springs located beneath the bed and set them aside in a safe place. These springs are easily misplaced during service, so removing them now will help prevent them from being lost.
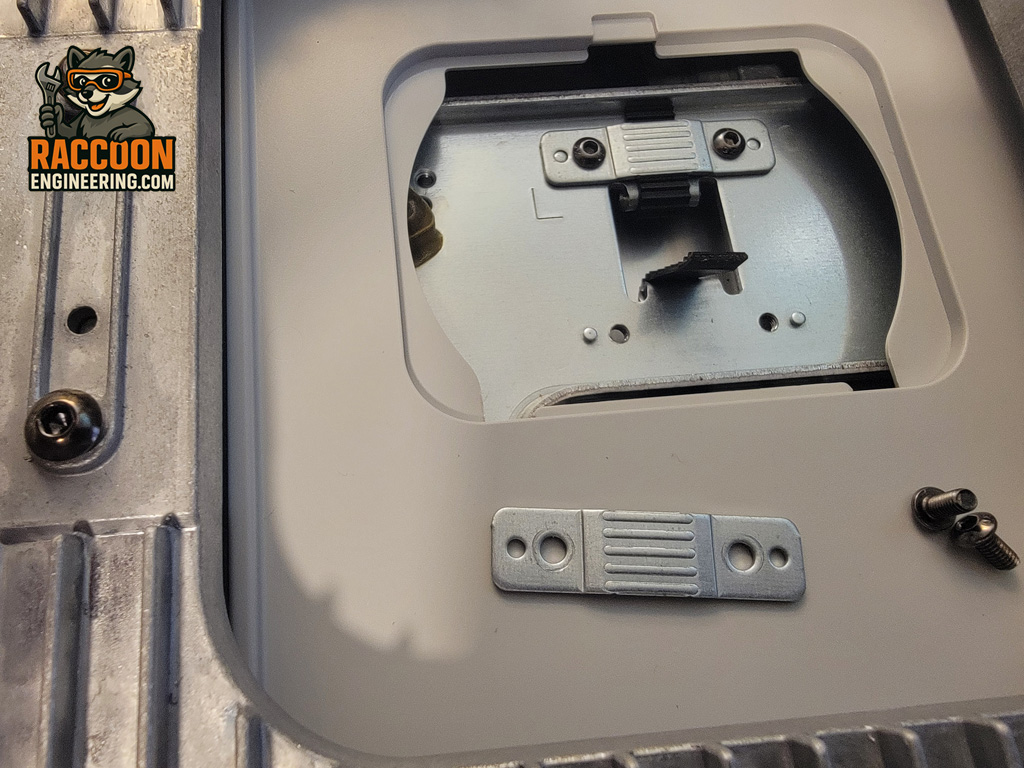
Next, unclip the two plastic inspection covers in the base of the printer. Move the Y-axis carriage back and forth until the belt attachment points become visible through the larger inspection opening (Figure 4). Once the belt retaining clamps are accessible, remove both clamps using a 2 mm Allen driver. This will release the belt from the bed carriage.
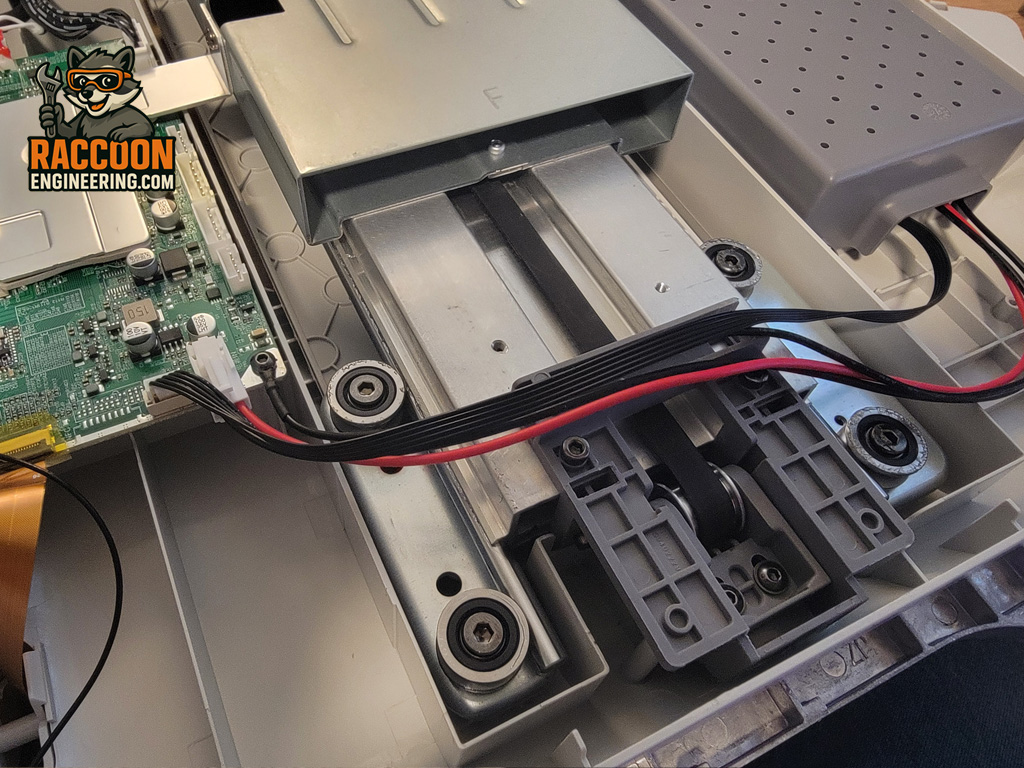
The Y-axis belt is routed through the inside of the frame, where it wraps over a rolled guide edge before being secured by the two retaining clamps. From there, the belt continues forward through the frame to the Y-axis belt tensioning assembly (Figure 2) located at the front of the printer (Figure 5). It then routes back through the frame to the Y-axis stepper motor drive pulley at the rear of the printer (Figure 6).
During reassembly, pay close attention to the original belt routing to ensure the replacement belt follows the same path. In many cases, it is helpful—or even necessary—to remove the front Y-axis belt tensioning assembly.
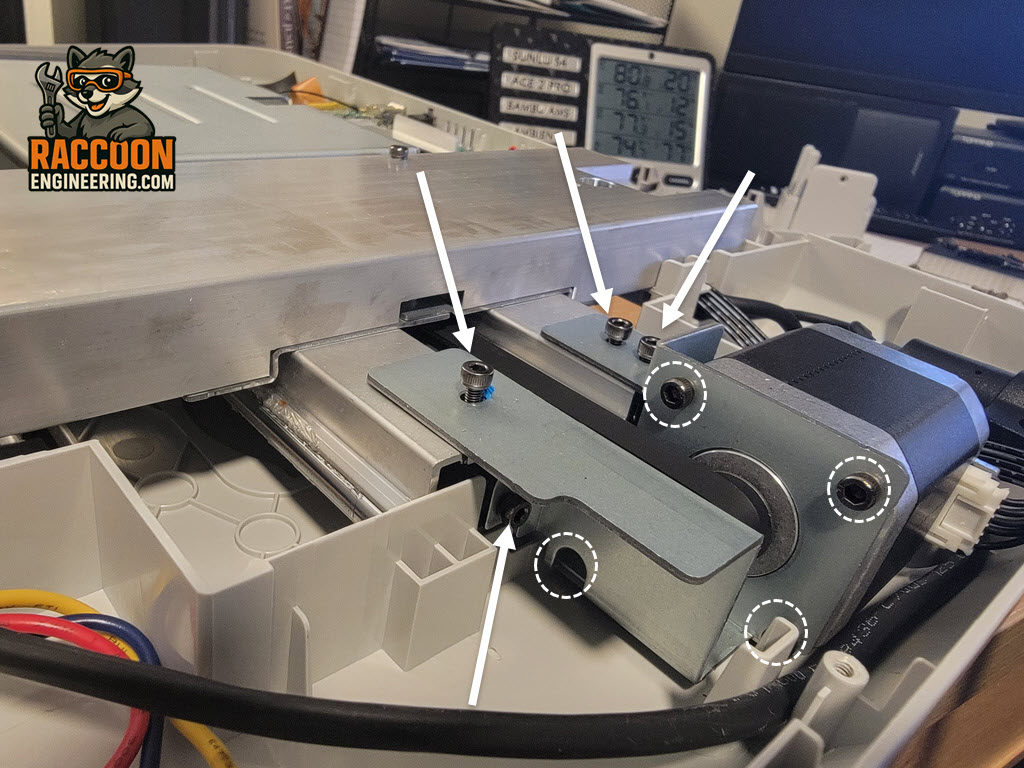
Before installing the new belt. The clearance through the tensioning frame is very tight, and the replacement belt may not pass through the opening easily with the tensioner installed. Removing the tensioning assembly provides additional clearance and makes routing the new belt much easier. Once the belt is correctly routed, reinstall the tensioning assembly, secure the belt with the retaining clamps, and verify that the belt is properly aligned before adjusting the final belt tension.
When replacing the belt, it is important to set the tension correctly. I have found that the belt does not. always pass the resonance check during the calibration procedure on the first attempt. In many cases, the belt needs to be cycled a few times before it fully seats, requiring the tension to be readjusted. As a result, you may need to repeat the belt tension adjustment procedure outlined at the beginning of this document a second time.