
Z Axis Problems
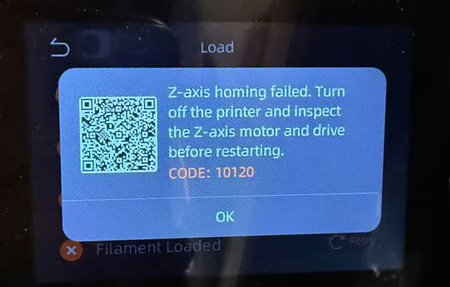
Z-Axis Homing Errors and Nozzle Dragging
Here are the first things to check if you are experiencing a Z-axis homing error (Figure 1) or if the nozzle is dragging across the build plate. Both problems can be caused by several different mechanical or sensor-related issues within the Z-axis homing system. The following checks will help you work through the most common causes and identify anything that may be preventing the printer from properly detecting the build plate during the homing process.
Quick Checklist
- Check for filament or debris under the build plate.
- Make sure the upper and lower nozzle latches are properly closed.
- Verify that the nozzle is not damaged or separating.
- Check that the heatsink does not move up and down.
- Check the Z-axis cable connections on the bottom of the printer.
- Perform a full calibration.
How Z-Axis Homing Works
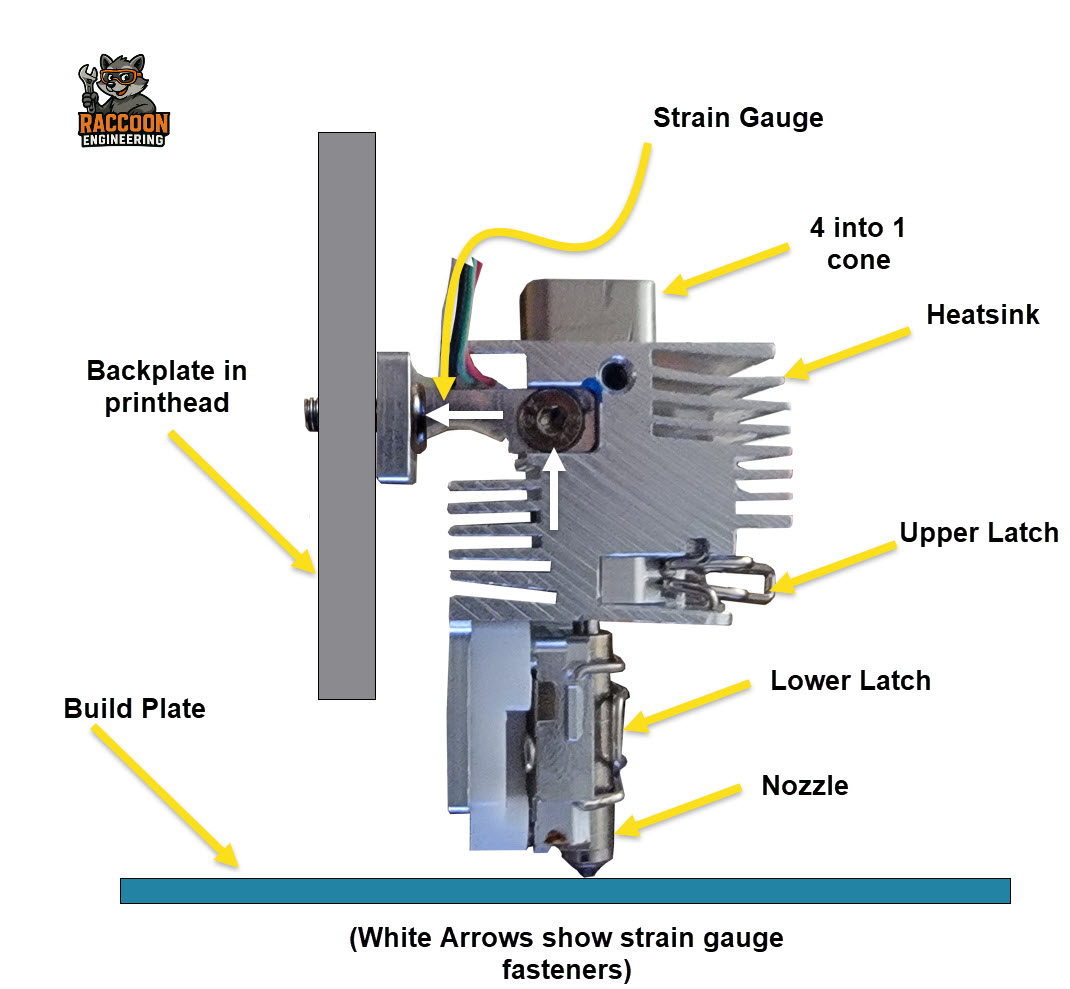
For the printer to home properly, everything in the nozzle and heatsink assembly needs to be tight and intact.
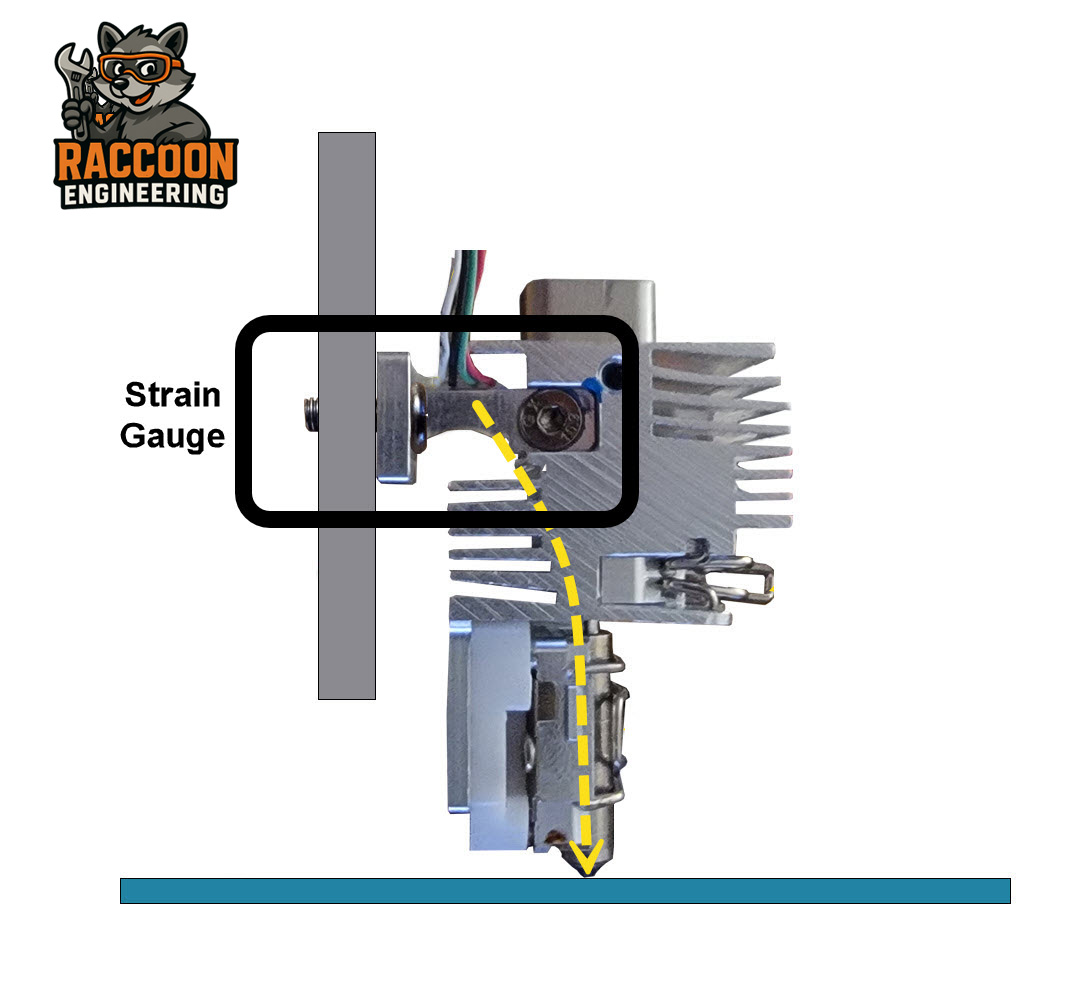
During Z-axis homing, the printhead lightly probes the build plate. The force from the nozzle contacting the plate is transferred through the heatsink assembly to the strain gauge sensor, which detects the contact. See Figure 2.
You can see the components involved in this process in Figure 3.
Check the Heatsink
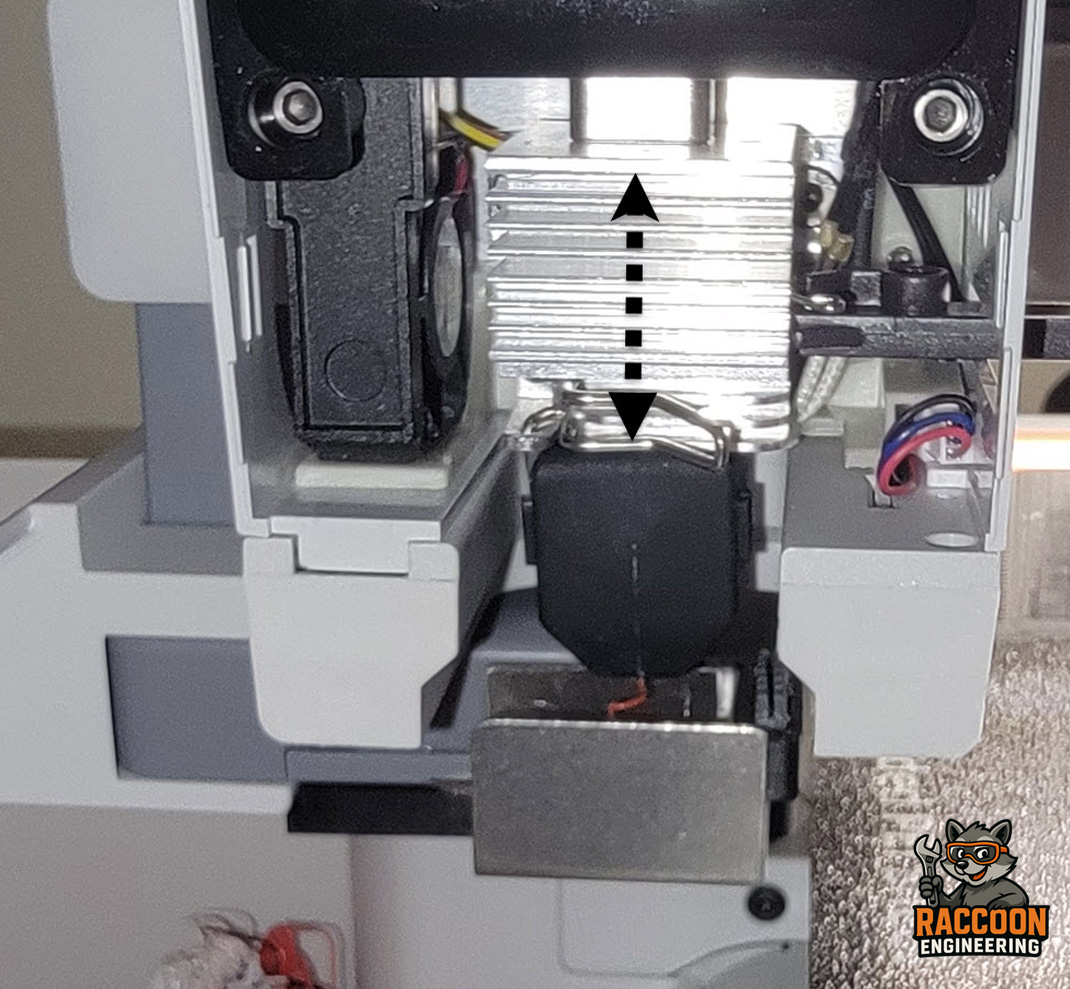
Start by checking whether you can move the heatsink up and down. It should be secure with no noticeable movement. See Figure 4.
If the heatsink wiggles, you probably have loose fasteners on the strain gauge assembly.
The fasteners that attach the assembly to the back plate can be checked easily after removing the front cover of the printhead. However, the fasteners on the side—which are more likely to loosen—require removal of the printhead and the full outer cover to access.
Inspect the Nozzle
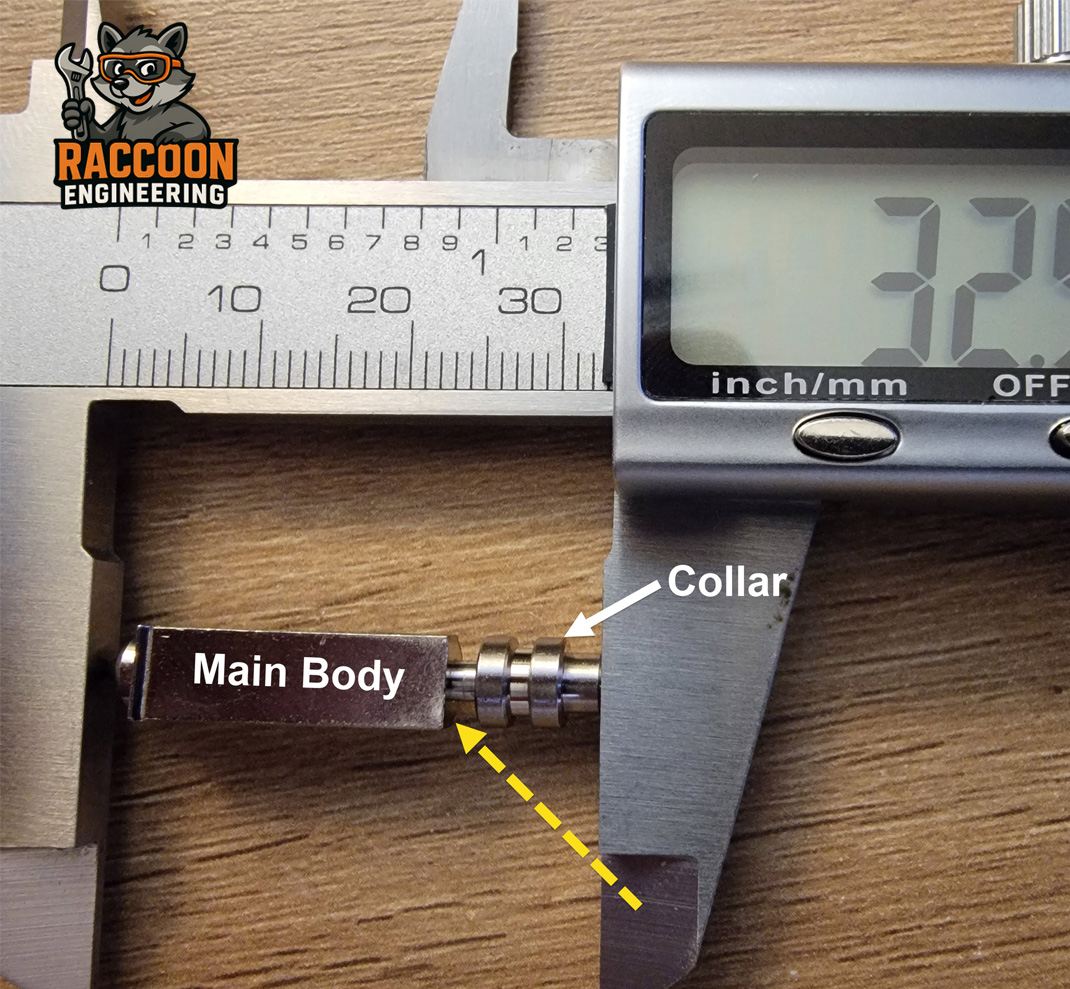
A nozzle in good condition is shown in Figure 5.
The nozzle is made up of three primary pieces:
- The main body
- The nozzle tip
- The upper collar, which is pressed into the main body (yellow arrow)
The upper collar provides the primary connection between the nozzle and the printhead.
It is becoming increasingly common for the main nozzle body to separate from the upper collar. If this connection becomes loose, movement can occur when the nozzle contacts the build plate and the printer may not home properly.
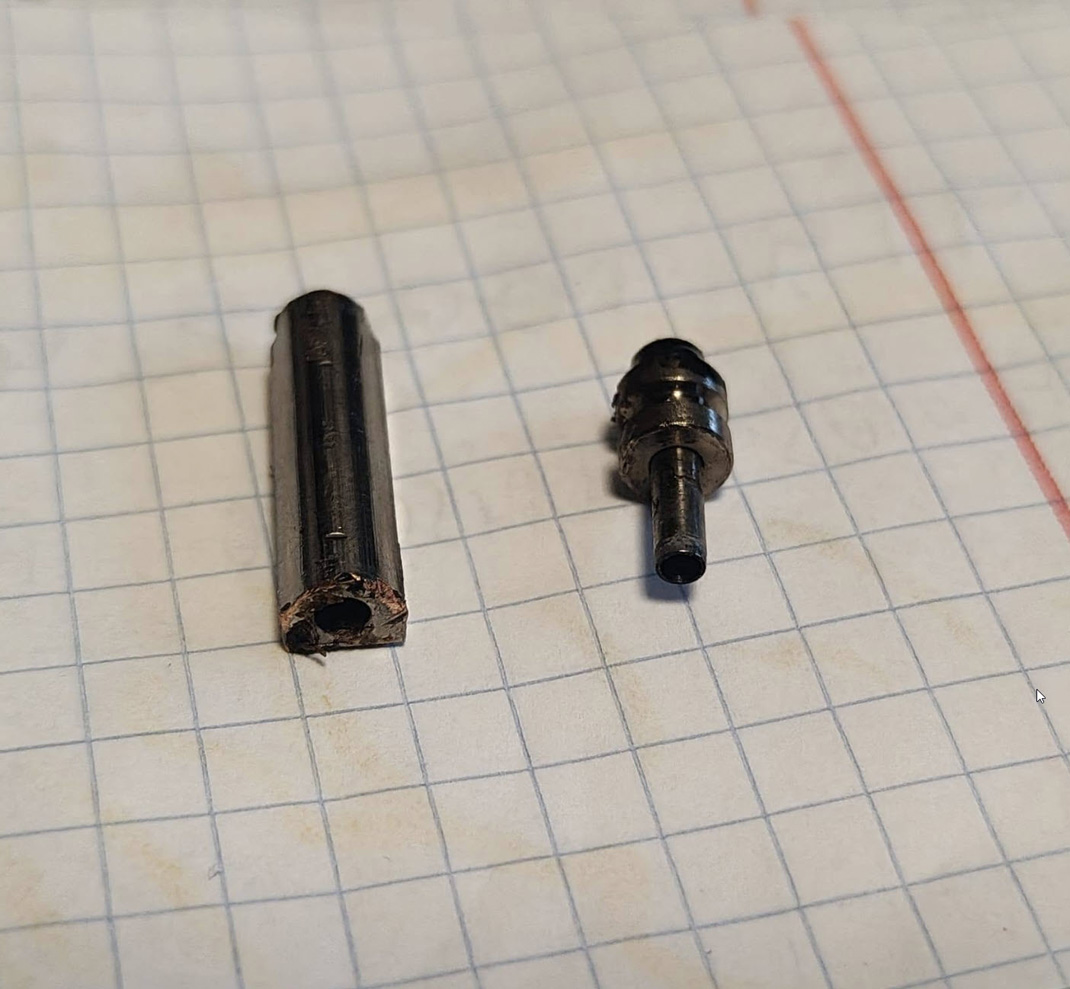
An example of a separated nozzle is shown in Figure 6.
Also make sure both the upper and lower nozzle latches are completely closed and properly securing the nozzle.
Check Under the Build Plate
Remove the build plate and check underneath it for pieces of filament or other debris.
Even a small piece of filament trapped between the magnetic bed and the build plate can raise or distort the plate enough to cause homing, calibration, or nozzle-dragging problems.
Clean both surfaces and reinstall the build plate, making sure it is seated properly.
Check the Z-Axis Cable
The Z-axis cable harness can also cause homing problems.
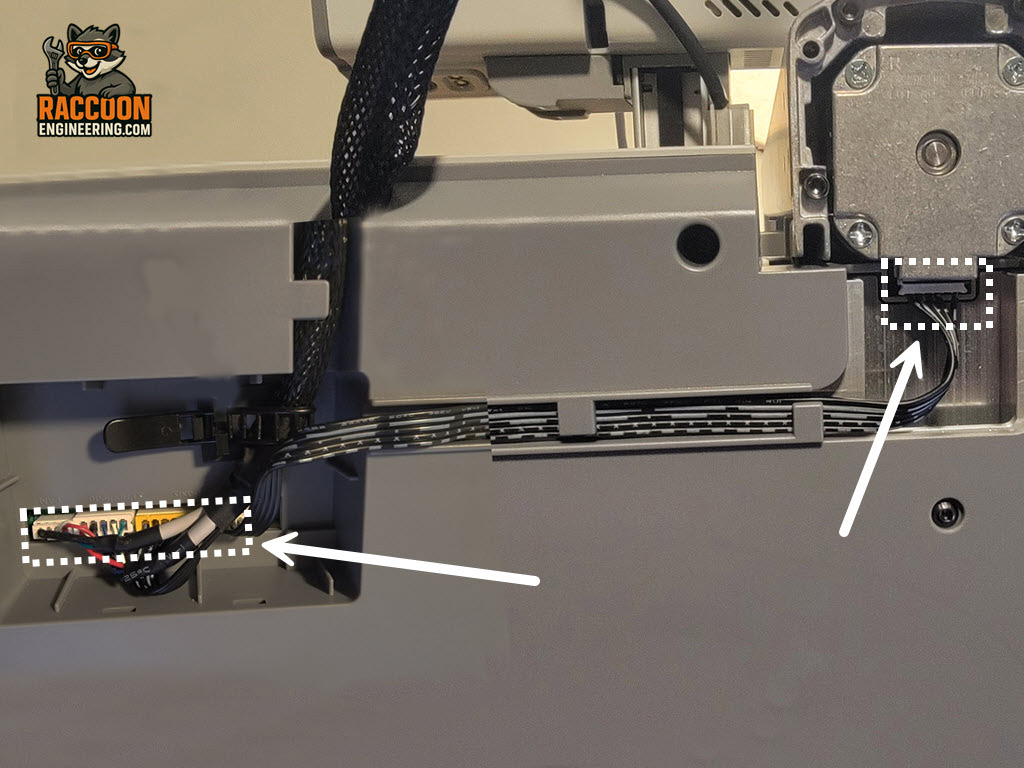
Carefully position the printer so you can access the bottom, then remove the small wiring cover.
Unplug and reconnect the Z-axis cable at both ends to make sure the connectors are fully seated and making a good connection. See Figure 7.
Perform a Full Calibration
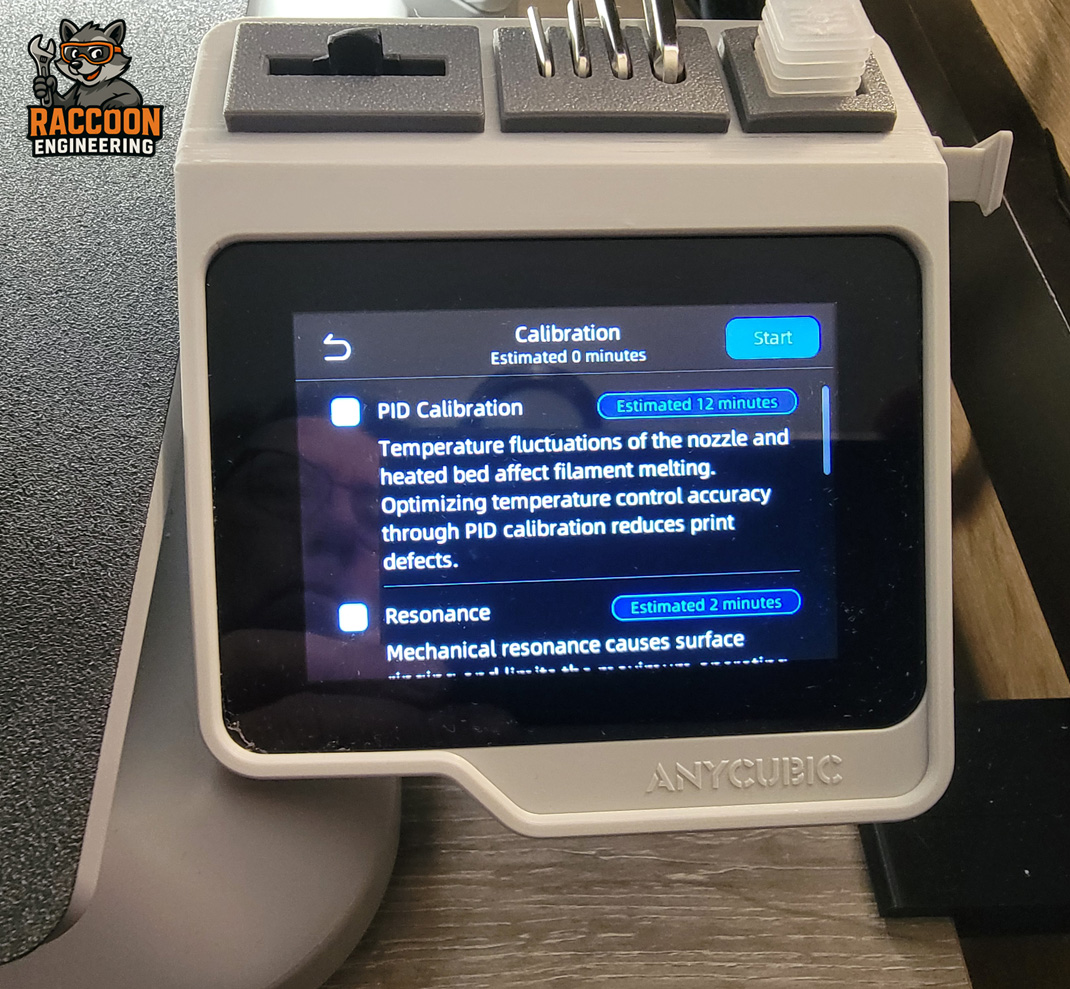
If everything above checks out, perform a full printer calibration. See Figure 8.
Allow the entire calibration process to complete before testing the printer again.
If the Problem Continues
If you have completed all of the checks above and the printer still has a Z-axis homing error or the nozzle continues to drag across the build plate, the problem may be more involved.
Possible causes although unlikely include:
- A faulty strain gauge or connection to printhead motherboard
- Z axis motor and related motion components
At this point, further printhead troubleshooting or disassembly may be required.